
|
I discovered Oh Happy Day around Christmas of this year and I have been obsessed ever since. Every morning, after I check my email, its one of the first blogs I look at. From their website: "Oh Happy Day is a party and lifestyle blog based in San Francisco. We just moved back after spending a year in Paris, France. We love to throw parties and make things!" There are always colorful art projects, party planning tips, and so many gorgeous pictures. And she even has videos, which are just fabulous. I could spend hours just looking through her posts. If you get a chance, you should definitely take a look their website. You won't regret it. http://ohhappyday.com/
0 Comments
There are so many great passages of Scripture. Today I feel like sharing a few verses from 2 Timothy that I find encouraging.
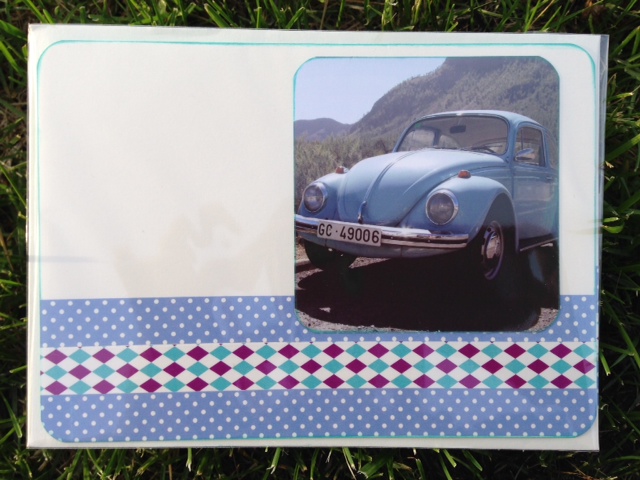
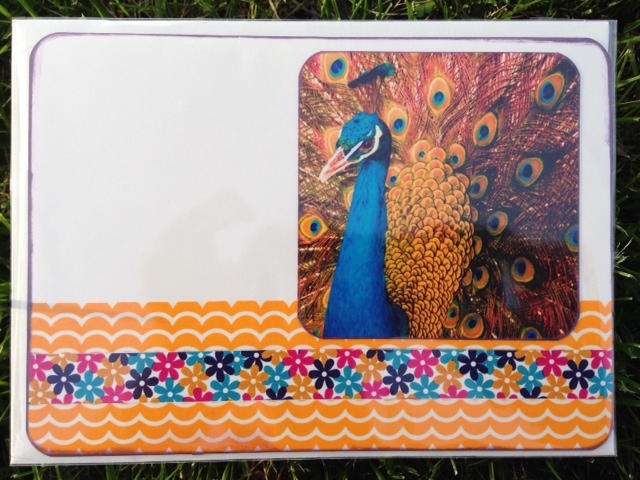
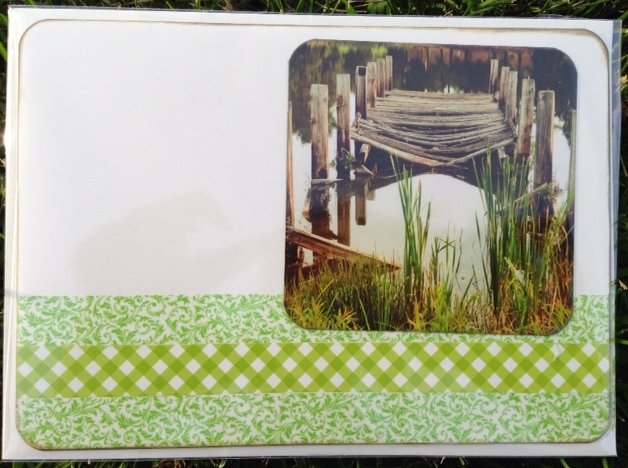
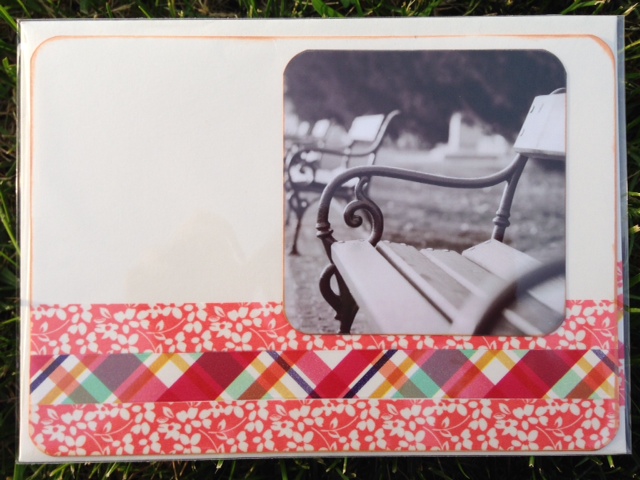
"Do your best to present yourself to God as one approved, a workman who does not need to be ashamed and who correctly handles the word of truth." (verse 14) "God's solid foundation stands firm, sealed with this inscription: 'The Lord knows those who are his," and, 'Everyone who confesses the name of the Lord must turn away from wickedness.'" (verse 19) "Flee the evil desires of youth, and pursue righteousness, faith, love and peace, along with those who call on the Lord out of a pure heart. Don't have anything to do with foolish and stupid arguments, because you know they produce quarrels. And the Lord's servant must not quarrel; instead, he must be kind to everyone, able to tech, not resentful. Those who oppose him he must gently instruct, in the hope that God will grant them repentance leading them to a knowledge of the truth, and that they will come to their senses and escape from the trap of the devil, who has taken them captive to do his will." (verses 22-26) In April, I joined a group called "30 Days of Hustle." Spearheaded by Jon Acuff (creator of Stuff Christians Like), it is an ongoing project that encourages people to work towards their goals in a new and exciting way. It also gives us an amazing network of other like-minded people who are working towards similar goals. Through the Hustle project, I have met some amazing people who are also working on crafty business hustles (crafty as in putting glitter on things, not crafty in an "I'm going to take over the world with my devious plan!"). One of the people I met is April Best, who has a business called No Excuses Encouragement. She creates greeting cards with cute matching envelopes that come with stamps already on them giving you no excuse to not mail them. We thought it would be fun to trade our wares and report back on what we received. I received a fun package of four greeting cards with matching envelopes (see designs below). The cards are very durable and have real photos attached to them. And of course, my favorite part, they all come pre-stamped. The only hard part was deciding who I wanted to send cards to. 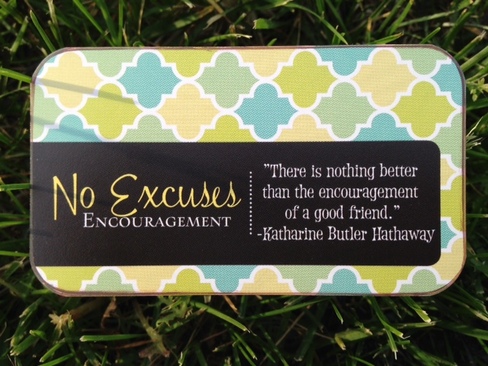 How cute are her business cards?!
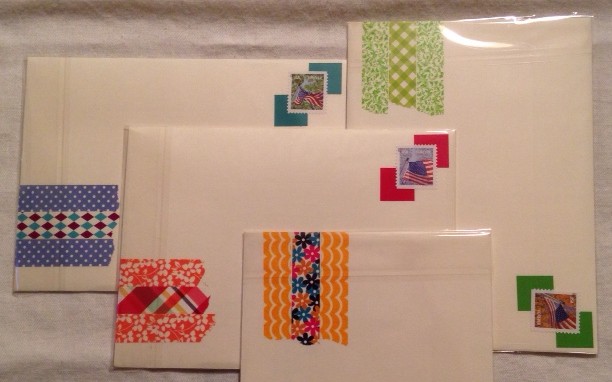 Fantastic matching envelopes I highly recommend going to April's website noexcusesencouragement.com and purchasing some cards for yourself. She has generously decided to offer a 20% discount to Simply Beadiful readers -- just enter the code SIMPLYBEADIFUL when you check out.
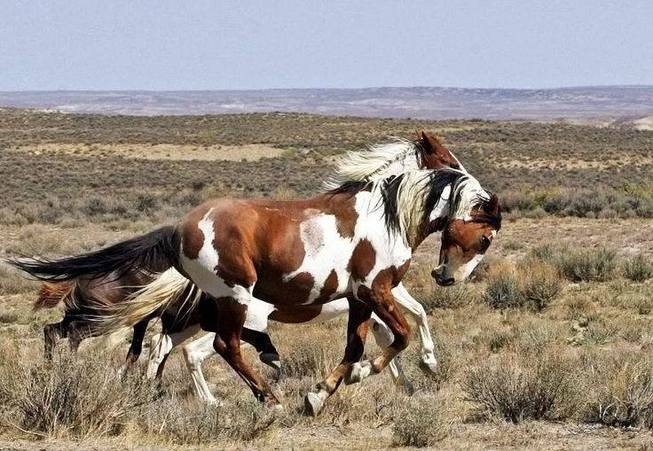
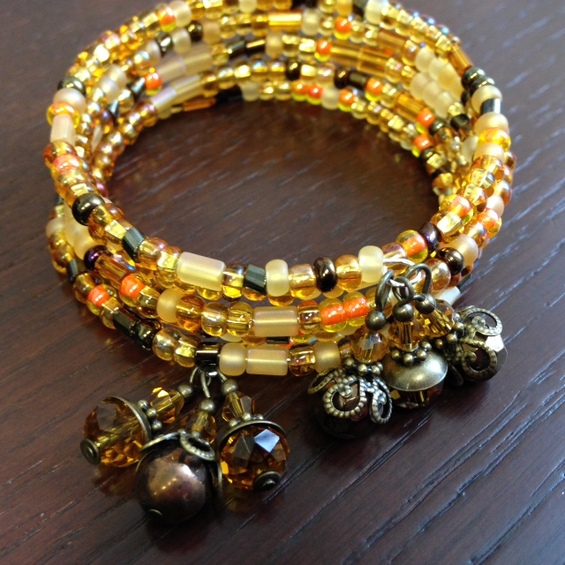
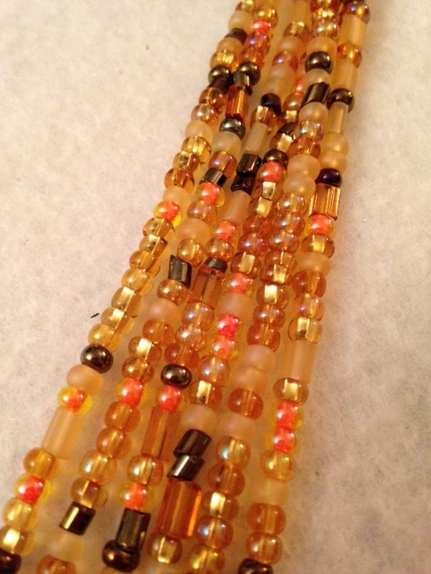
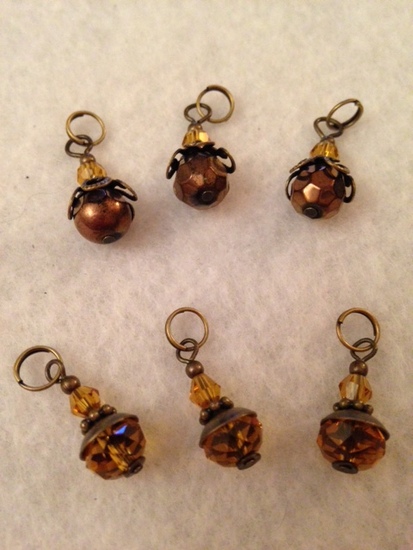
If you have read any of my previous blog posts this year, you know that I have been slightly obsessed with cowboys. Maybe it comes from growing up in Kansas, or having the last name Winchester, but I love the Wild West and all it has to offer. When I saw this picture, I was intrigued. As part of the 12th Non-Blogger / Blogger Challenge. Kelly Hosford Patterson chose the theme "Free Spirits of the Wild West." I didn't make it through two sentences of the following link before I knew that I wanted to create something with this theme. http://travelingsideshow.blogspot.com/2014/03/free-spirits-of-wild-west-12th.html Part of what I love about the West is the element of simplicity. Cowboys (and cowgirls) didn't need lots of fancy bells and whistles as they weren't practical for their daily life. From what I have read, they didn't wear much jewelry at all unless it was a special occasion. I decided I wanted to make a piece that could have been worn by such a cowgirl. When I started planning my piece, I knew I wanted to do something fairly simple. I also wanted to invoke the colors of my beloved Kansas--browns and yellows. In keeping with the theme of simplicity, I wanted to create something that wouldn't require lots of extra effort to wear. It would have to be something that any cowgirl could put on by herself, so I decided to create a memory wire bracelet. I found a gorgeous mix of seed beads in brown, orange, amber and yellow that perfectly matched my idea. Wanting to add just a little bit of extra pizzazz, I used these gorgeous charms I found as little clusters at each end. It ended up being a tad more fancy than I think a cowgirl might wear on a daily basis, but I love how the colors and the charms worked together.
Several times a month, I travel to different nursing homes in Lexington to teach jewelry classes. Each class is an unexpected mix of humor, fellowship, and 'on the fly' troubleshooting. I never know how they will turn out, and you probably wouldn't believe half of the stories if I told you :)
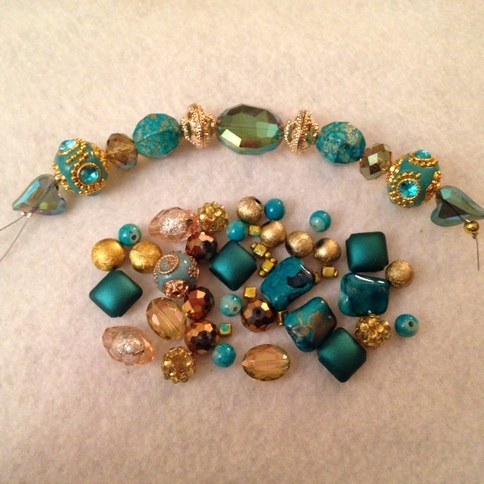
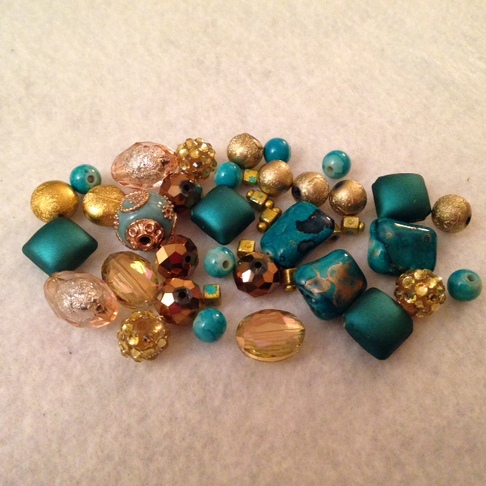
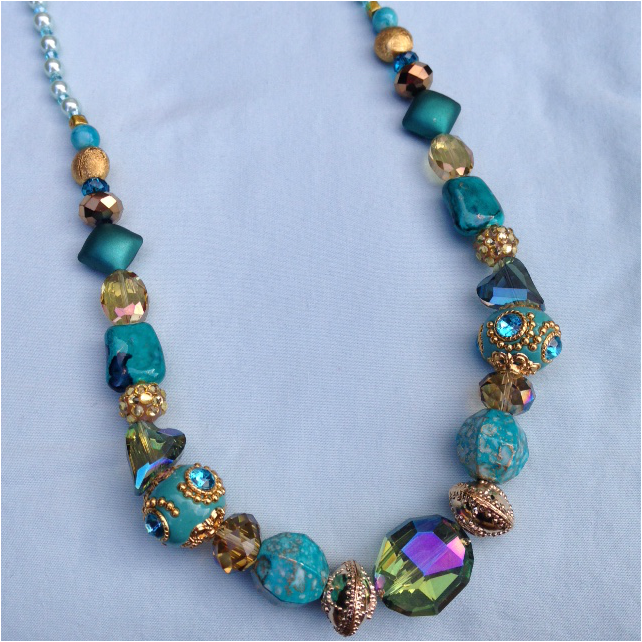
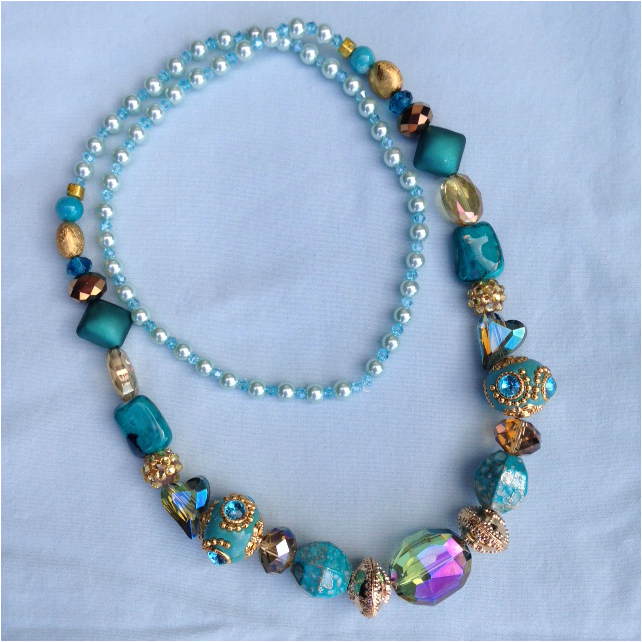
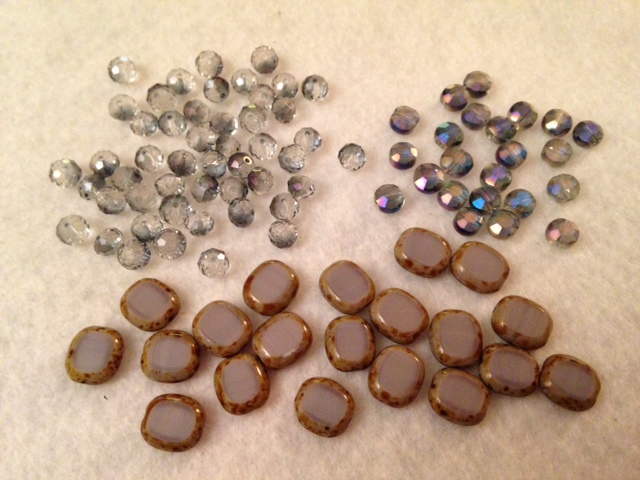
I often get asked about why I don't write about my classes. While I do write out some of the experiences for my own records, I am hesitant to write about them publicly. I want to respect my students' privacy and dignity. I never want them to feel like they are fodder for teasing, ridicule or public scorn. Each woman (and the few men that join us) is a unique treasure that I am happy to have crossed paths with. After spending some time bead shopping this weekend, I was in the mood to create some beady goodness. I came up with three necklaces that I love. The first necklace I am calling Turkish Delight. I LOVE the combination of gold and teal / turquoise / seafoam together. There is just something magical and mystical about it. When I found the string of beads below (top right) I couldn't leave the store without them. 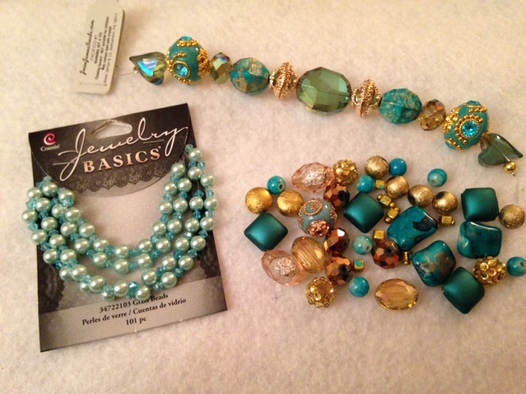
I wanted to keep the string of beads just as they were as I thought that they were magnificent. I used some beads from a bag of complimentary beads to add some additional mystique and length. Since I wanted a long necklace that showcased the focal beads, I added a strand of light turquoise pearls and crystals to the end. Needless to say, I can't wait to wear this!
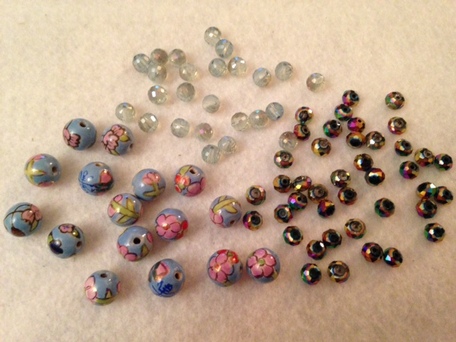
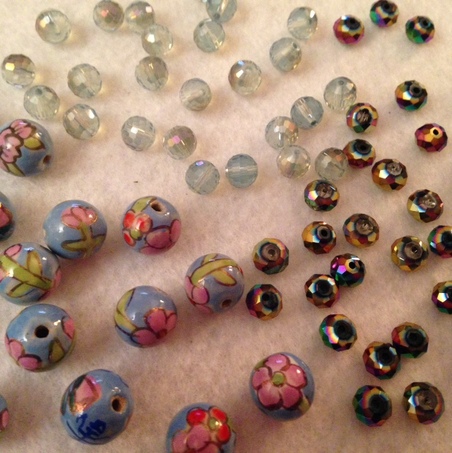
The second necklace I am calling Japanese Blossom. I found these delightful beads that had a very delicate looking design on them. Similar to a cloissone bead, they had bright colorful flowers that were trimmed in gold paint. They also had a cool asian script on them. The crystals I added really brought out the colors of the beads.
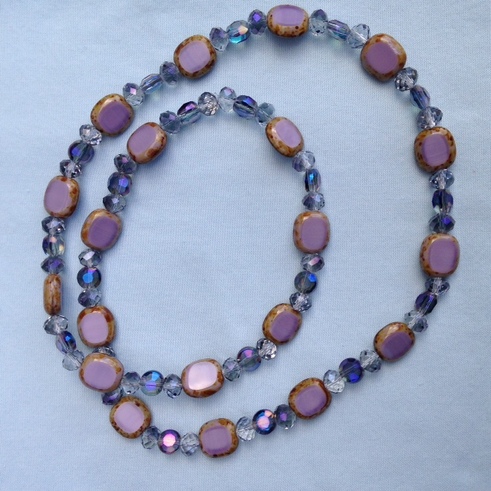
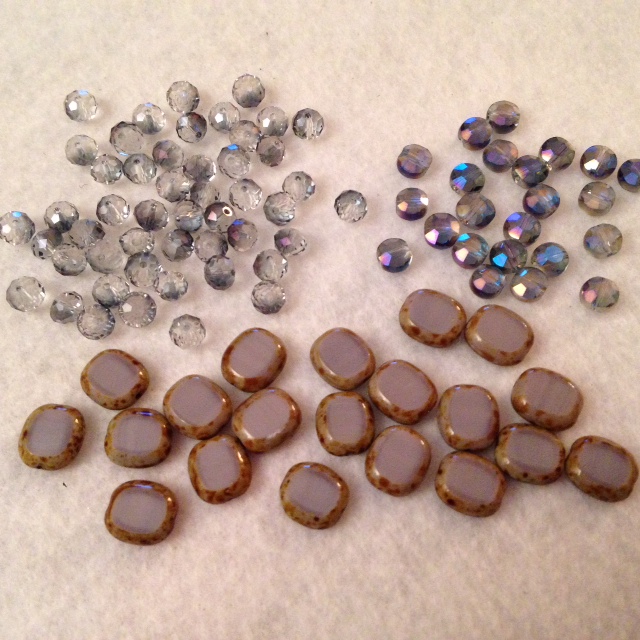
 The third necklace I am calling Venetian Breeze. I loved the cut glass beads (bottom center). The light purple is accented by the brown speckled edges, and I felt that the crystals really complimented the colors well. They added just the right amount of sparkles.
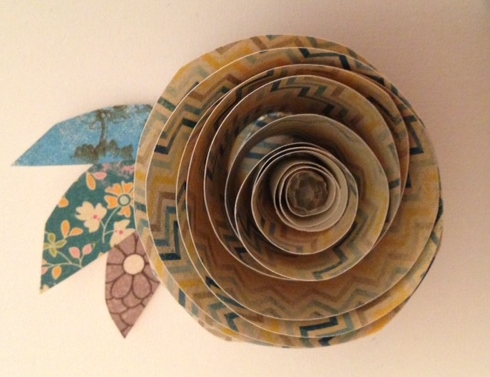
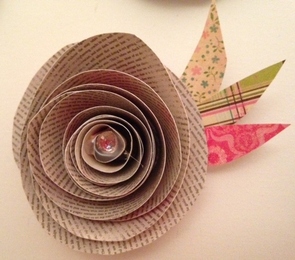
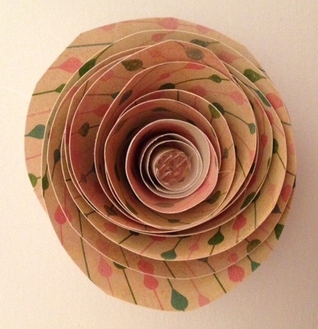
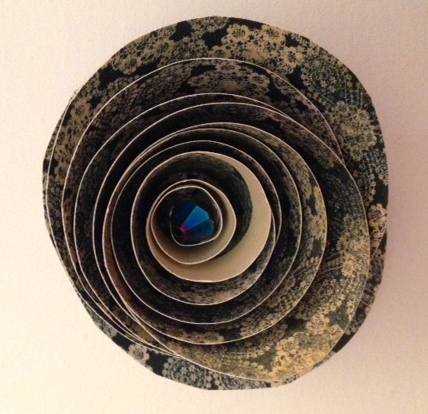
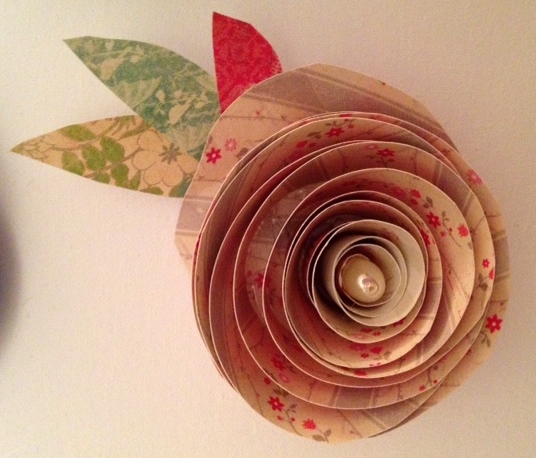
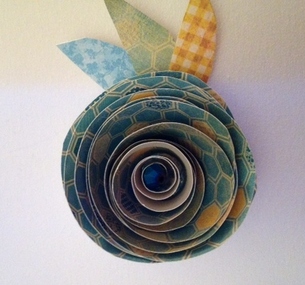
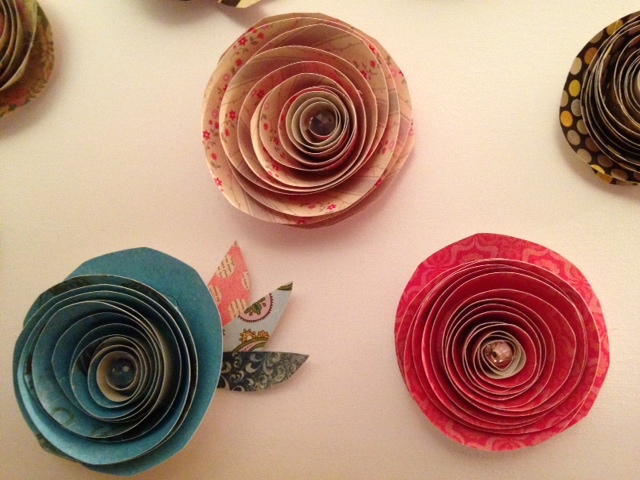
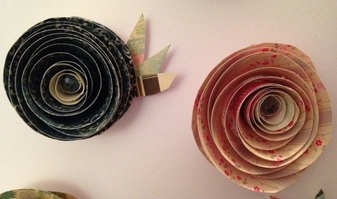
 I wanted to make a nice wall hanging for my office, but I wasn't sure what to do with such a large space. So I did what any good crafter would do...I got on Pinterest. After hours of browsing, I discovered this paper flower garland that I loved. The instructions seemed pretty straightforward, so I decided to make some for myself. The one thing the instructions left out was how addicting they are to make. They are like Pringles: once you start, you just can't stop. 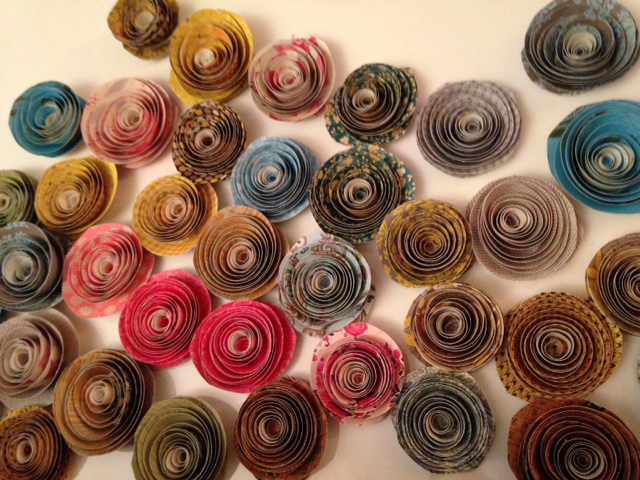 Isn't this paper just divine?! 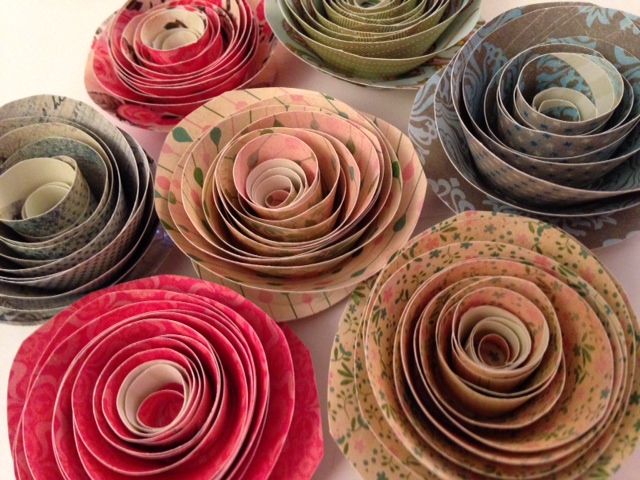 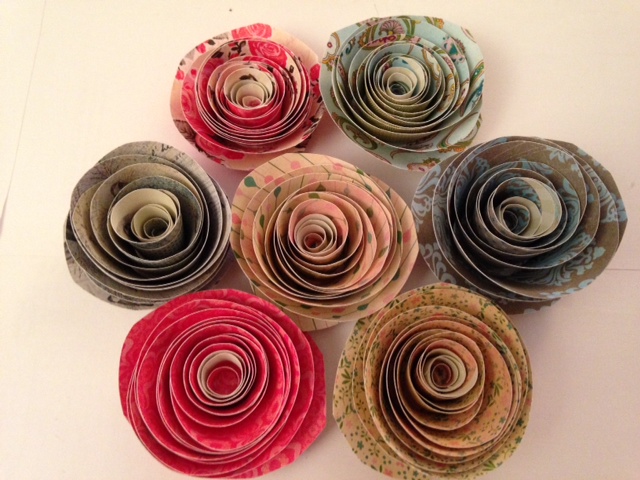 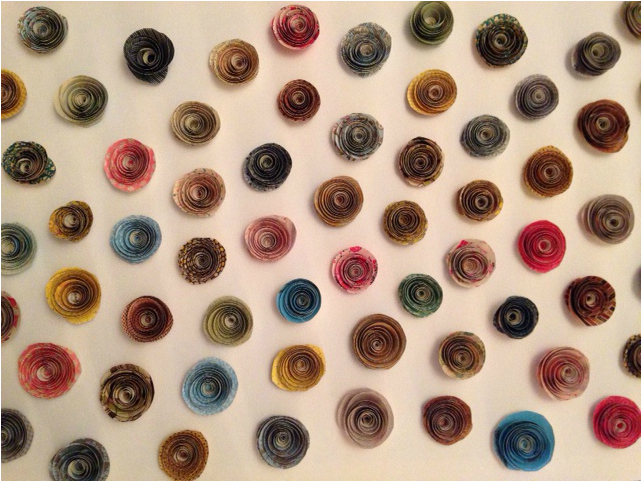 After a week of looking at the above picture, I decided that it needed more rosettes...I wasn't crazy about the pattern. So I made 48 more rosettes and added them to my picture. I LOVE how it turned out and can't wait to hang it in my office. 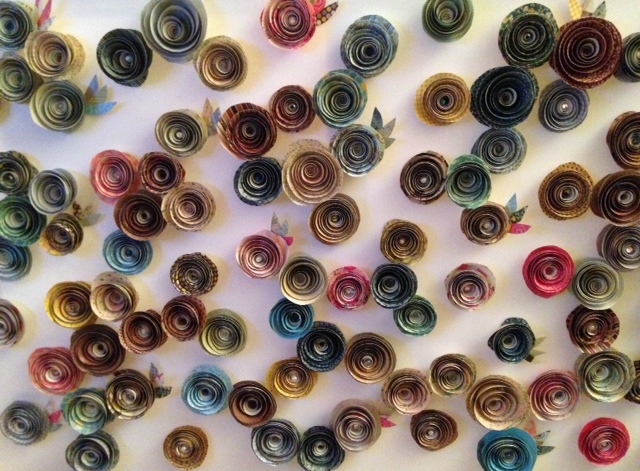 Basic Instructions:1. Pick out your paper. I used 7" x 7" double-sided scrapbook paper. You can make them with any kind of paper you want, but I found that the thicker scrapbook paper really seemed to hold its shape well. 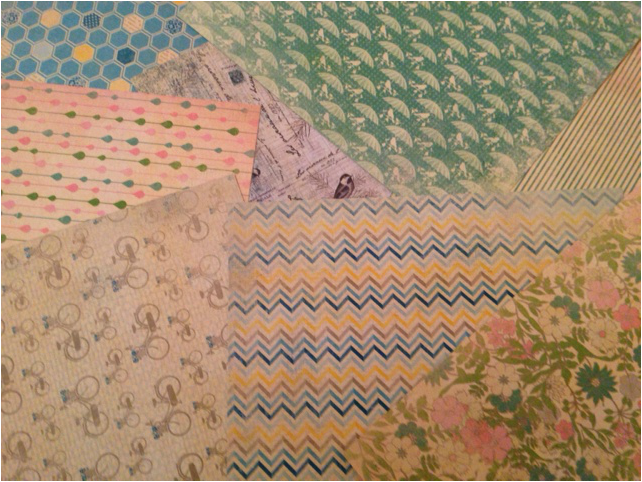 2. Trim the edges of your paper to make it a very rough circular shape. I eyeballed it and ended up with more of a rounded square, but it worked. 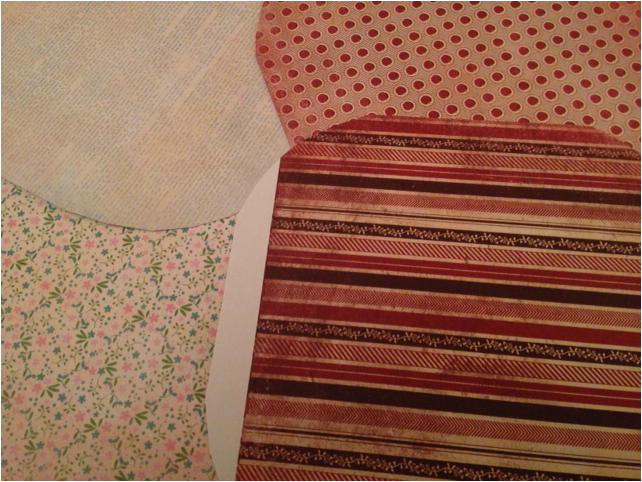 3. Starting at the outside edge, begin cutting a spiral into your paper. You can trace it first if you want, but I just eyeballed it and it turned out pretty well. Its ok if your spiral isn't perfect. If some sides are lop-sided, it gives an extra dimension to the petals once it is rolled up. When you get to the middle, leave about an inch sized circle (this becomes the base). 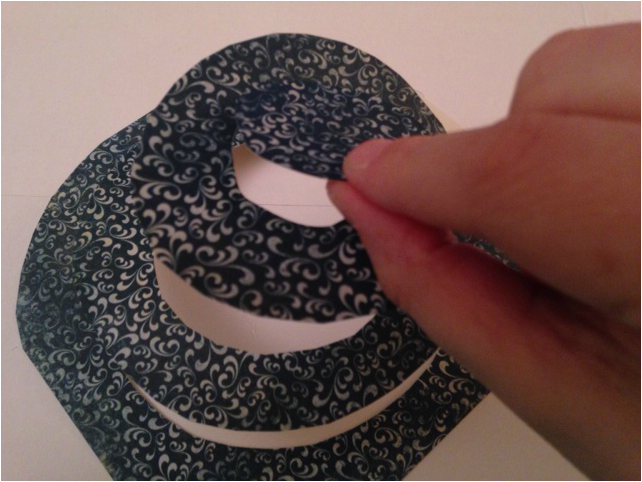 4. Starting at the outside, begin rolling your paper inward. You can use a pencil or something round to help you get started. Roll until you get to the center (you should have a pretty tight paper roll by this point). 5. Very carefully, release the spiral, allowing your rosette to uncurl a little. When you are satisfied with the way your rosette looks, carefully glue to the base. This part can be a little bit tricky. I used one finger on top, and put my thumb on the bottom to keep the rosette from uncurling any more. 6. Using a hot glue gun, place glue on the base and then place flower on top. You can adjust the spiral to your liking. Sometimes it takes an extra bit of glue to get all of the spirals to stay in place. Don't burn your fingers--it hurts!! 7. For added sparkle, glue a crystal, pearl or other bead in center. I also used the edges I cut off in step 2 to make leaves. you can be as creative as you want at this point. 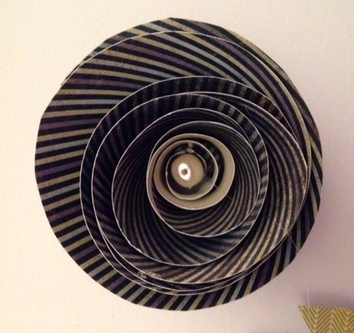
Sometimes life gets so wild and crazy and complicated. And what seemed to be like a nice quiet day turns into a chaotic tornado of thoughts and feelings and apprehension. I wish I could say that I was better at dealing with things like that, but I'm not. God is. And he is calling us to "be still and know that I am God..." (Psalm 46:10). He's got this. He's got all of the scary stuff under control. He just wants us to be still, to draw near to Him and to trust that He can work this all out for His good.
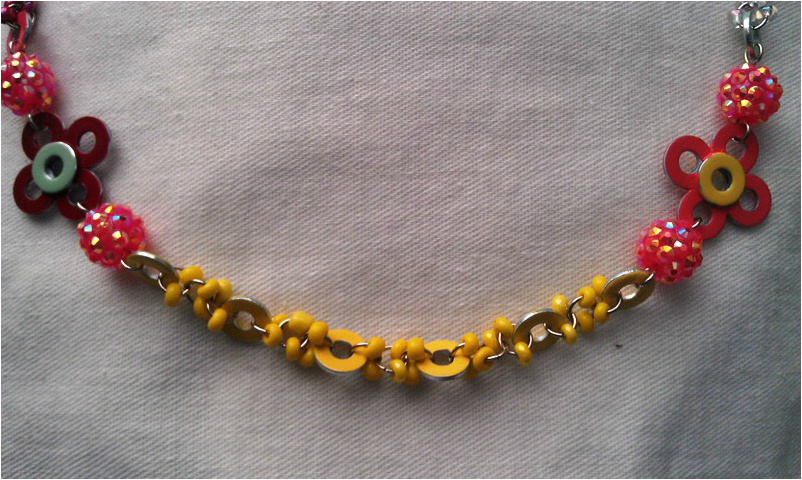
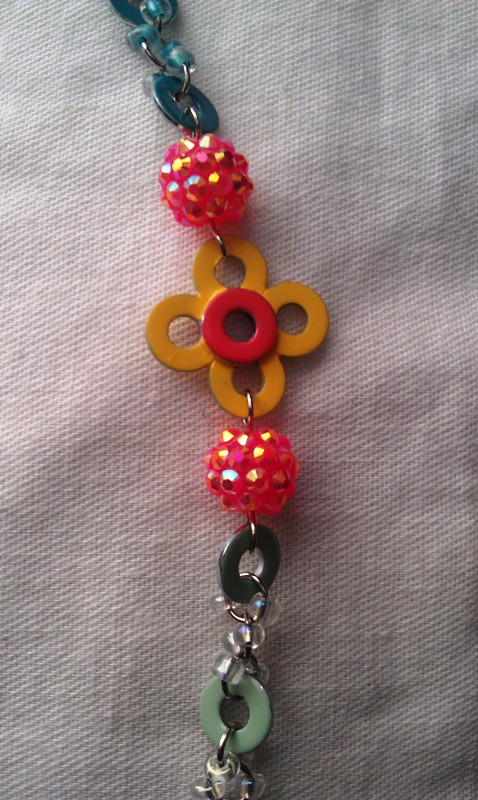
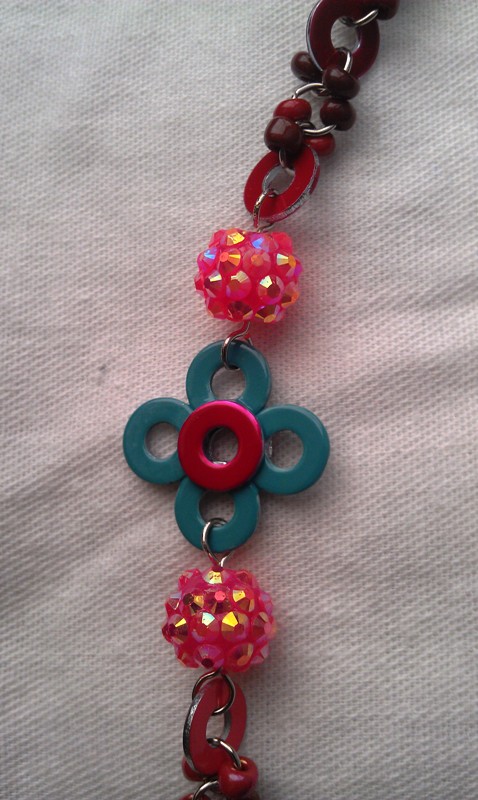
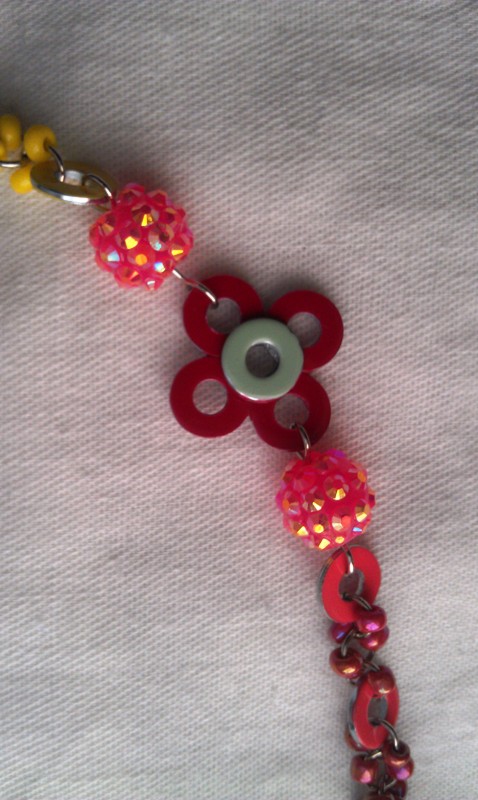
Attached below is an old Stephen Curtis Chapman song entitled "Be Still" that I am currently obsessed with. I challenge you to listen to it http://www.youtube.com/watch?v=lHlbnNUHQGI&list=RDeYXHLf3QJXI I, like everyone else in the country, am a little tired of winter. I miss Spring, glorious days filled with sunshine, warm weather, wearing flip flops, and all things unrelated to snow. So I decided to cheer myself up by making something bright and colorful. After making the black and white cross last week, I was inspired to make something with the leftover silver washers. Over the past year, I have collected some really great colors of fingernail polish. I love how bright and cheery they are. 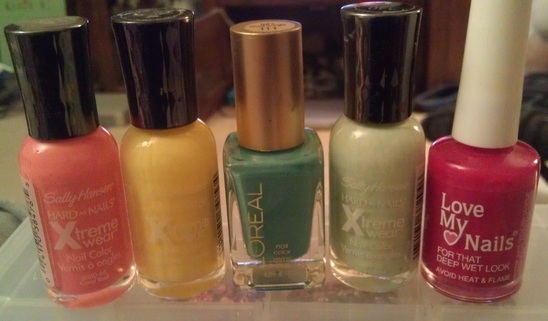
Don't they have fun names?! 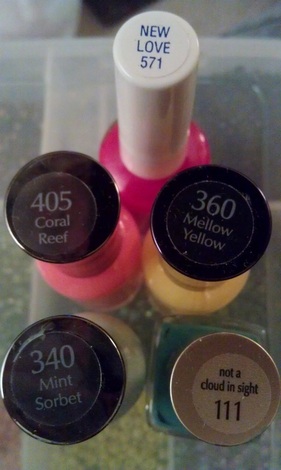
I decided to make washer flowers in several different colors. New Love with a Mint Sorbet center...Mellow Yellow with a Coral Reef center (and vice versa)...and Not a Cloud in Sight with a New Love center. (Isn't the Coral Reef just divine?!) 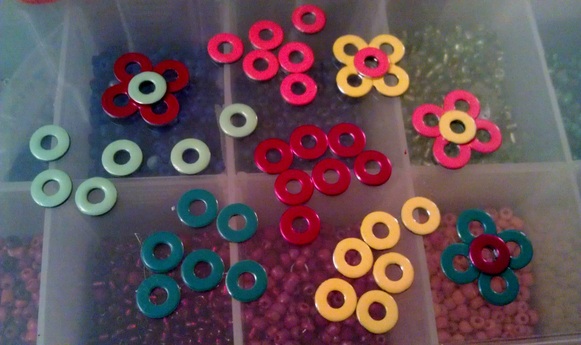
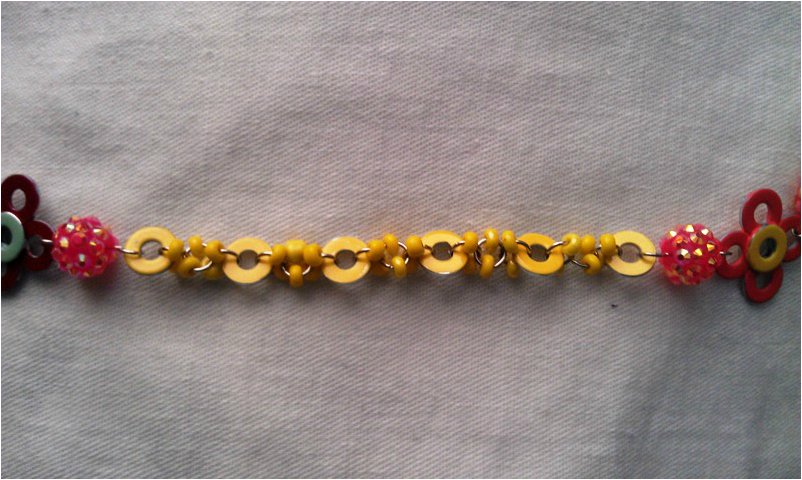
As I waited for my flowers to dry, I decided to paint some single washers in each of the colors. I decided that I could make a beaded chain using the washers as accent colors. When I first started working on the chain, I tried making a pattern with the colored washers. It didn't look quite right, so I slept on it and came back to it the next day. I realized that I liked the way the color blocking looked, so I made chains with all like colors and added seed beads in the same colors.
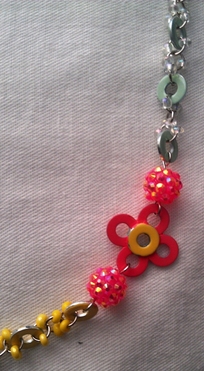
I loved how the colors played off of each other but it felt like something was missing...maybe something sparkly?! I found the rhinestone beads in a gorgeous coral color and thought they would be perfect. So I used them on either side of the flowers as an accent.
I love how the finished necklace turned out. It is bright and sparkly and full of personality. The more I look at it, the more I realize it has a certain Spanish flair to it, which I love. 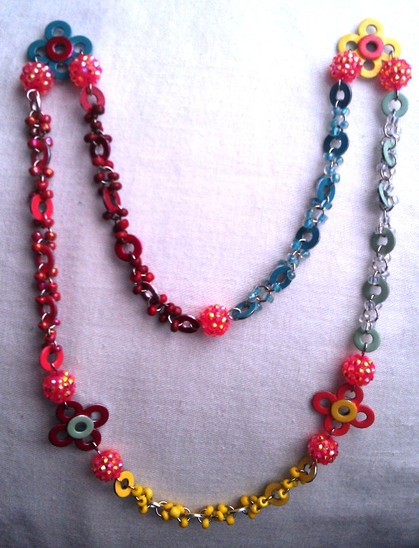
Over the last three years, I have taught 118 classes. Some were to adults, some to children, and lots were to my sweet, spunky senior citizens.
I have taught at nursing homes, senior centers, the YMCA, craft stores, and even my dining room table. I have met hundreds of new friends, and lost several of them to their eternal home. I have learned a lot of things including: how to take a right hook, how not to panic when someone has a medical emergency, how to be patient, how to improvise, how communicate with someone in non-traditional ways, how to multi-task, and how to take criticism. I have also learned that it is unbelievably cool to watch someone else learn how to create something. It even more exciting when they thought they couldn't do it. All in all, I've really enjoyed my classes and look forward to the next 118. |
Archives
November 2015
Categories
All
|
 RSS Feed
